Linux distributions are operating systems much like Windows or MacOS. Many of the features found in Windows or MacOS are also present in Linux operating systems. However, a powerful tool often not notably used in Windows or MacOS is the UNIX command line terminal. In many ways, it can seem like a primitive tool, but its efficiency and flexibility make it a standard in software development. This blog post is going to go over the basics of using the UNIX command line terminal. As in anything, the best way to understand how to use it is to try it yourself. Note that everything these commands do can be done in the file explorer or using certain programs. There are two major reasons for learning them, First there are some computers(like the timberlake server) that only have the terminal, no UI. The second reason is that it’s quicker, maybe not now but keep in mind that the ui tends to simplify and pad things so users don’t need to deal with extra clutter or mess important files, the terminal does not do that. This is because most people who use computers are casual users, this is not at all a bad thing but it’s what most OS cater to.
This following segment is based on Ubuntu, but most Linux distributions will use the same commands.
Step 1, Opening a terminal on Ubuntu:
There are multiple ways of opening the terminal.
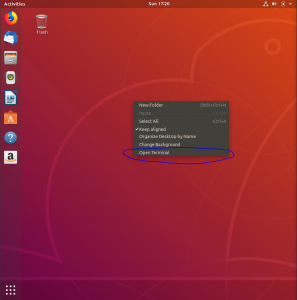
Option 1: Right click on the screen, a drop-down menu will appear, click open terminal.
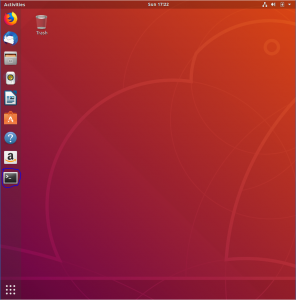
Option 2: Click on the terminal icon in the toolbar
It looks like this:![]()
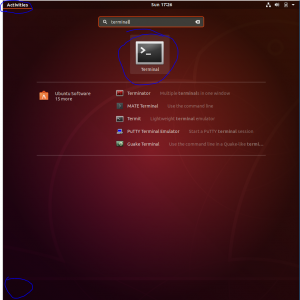
Option 3: Click on activities in the top left corner(or the  on the bottom left corner). Then search “terminal” and click on the terminal icon.
NOTE: Not all of these methods work for all distributions, but Linux is very customizable they might not be setup which is why I put multiple options. But, there is a terminal on all the distributions.
The terminal should look something like this.

Let’s break down what this means:
![]()
This is the username of the user currently issuing commands.
![]()
This is the name of the computer.
![]()
This shows which directory you’re in.
In this instance, the “~” symbol indicates you’re in the root directory.
![]()
Step 2, Creating a text file.
To create a file, use the command touch <name of file> like so:
![]()
This will create an empty .txt file
Next, to view what’s inside a directory, use the command ls:
![]()
ls will display all folders and files in your current directory
Step 3, Editing Files.
To begin, i’m going to introduce a simple text editor called nano
It is akin to Notepad on Windows or TextEdit on MacOS
The command works simply by writing nano <name of file> like so:
![]()
If nano is not found use the following command:
~$ sudo apt-install nano
Using this command will lead you to a terminal based text editor:
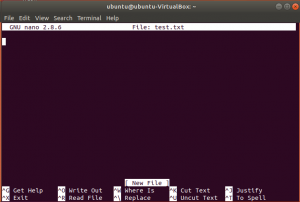
From here, you can type anything as you normally would
![]()
To save, press Ctrl + O, and enter
To exit, press Ctrl + X, unless saved, it’ll ask if you want to save the file, select yes by pressing Y and press enter
![]()
Step 4, Entering Timberlake server:
ssh stands for Secure SHell it allows you to connect to another computer remotely. You will use it to access the Timberlake server. This is a server that is used and maintained by the CSE department. To enter it, use the following command with your ubit username: ssh <username>@timberlake.cse.buffalo.edu
Note: you should be typing in your username not <username>
![]()
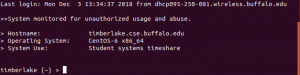
If it’s your first time connecting to Timberlake, this message will appear, type in yes and click enter.
![]()
Next type in your ubit password, the characters will not appear on screen for security reasons.
![]()
If everything works out then this will appear.
Step 5, Creating and Navigating Directories
Use the mkdir to create a directory called CSEtest:
![]()
To see the directory, use ls:

To go into a directory, simply use cd <directory>
![]()
To go back one directory, use cd ../ or cd .., to go back to the home directory(also called the root directory) use cd ~
![]()
To leave the Timberlake server use exit.
![]()
Step 6, Transferring files with SCP:
SCP or Secure Copy Protocol copies a file from one computer to another
The scp command is composed of 3 main parts,
- scp – the actual command
- The file to be sent – In this case its test.txt
- The location you want the file to be sent – following by a colon to the destination path.
![]()
If this is your first time using the scp command you may get this prompt. Type in yes.

With that your done! Hope this helps!
each time i used to read smaller articles or reviews that also clear their motive,
and that is also happening with this paragraph which I am reading here.