HTML Elements
Each element is rendered on screen in the order it appears in your code. This is know as the “flow.”
Most elements have an opening and closing tag, with some content in between.<p>This is paragraph text.</p>
A few elements are “empty” that is, they are self closing:
<hr />horizontal rule<br />line break
Elements can be nested within each other, from the largest and most general to the smallest and most specific. Each element must be closed after each element within it has been closed.
<div><p>This is the first paragraph within this div.</p><p>This is the second paragraph within the div.</p></div>
Block vs Inline Elements
Block elements by default cause a line break. That is, elements following will appear on a new line in the browser. (CSS styles can override this behavior.) Block elements can have a width and height applied to them with CSS.
Inline elements by default do not cause a line break. That is, elements following will appear on the same line in the browser, as long as there is room. If there is no room, the element will flow to the next line. (CSS styles can override this behavior.)
Structural
Structural elements determine the hierarchical importance and flow of the page, while also giving meaning to the content within.
Structural (block)
<div>divisions<h1>through</h6>><h6>headings<p>paragraphs<ol>,<ul>and<li>lists and list items<blockquote><div>
Structural (inline)
<b>bold<i>italic<a>anchor (links) <span>
Semantic
Semantic tags give extra meaning to content, like where to place <em> emphasis in a sentence. HTML5 contains semantic elements that define the meaning of different parts of a page:
<header>
<nav>
<main>
<section>
<article>
<aside>
<figure>
<footer>
Element Attributes
HTML elements can have attributes, which provide additional information about that element. Attributes are always specified in the start tag. Attributes come in name/value pairs like: name="value"
Examples:
<div id="sidebar"><a href="http://twitter.com/djlicata">Follow me on Twitter.</a> <img src="images/twittericon.png"> <div>
These attributes can be applied to any HTML element:
- class – one or more class names
- id – a unique identifier for that element
- style – an inline CSS style
- title – extra info that shows up as a tooltip
For a complete list of HTML elements and available attributes, see MDN’s HTML5 Reference.
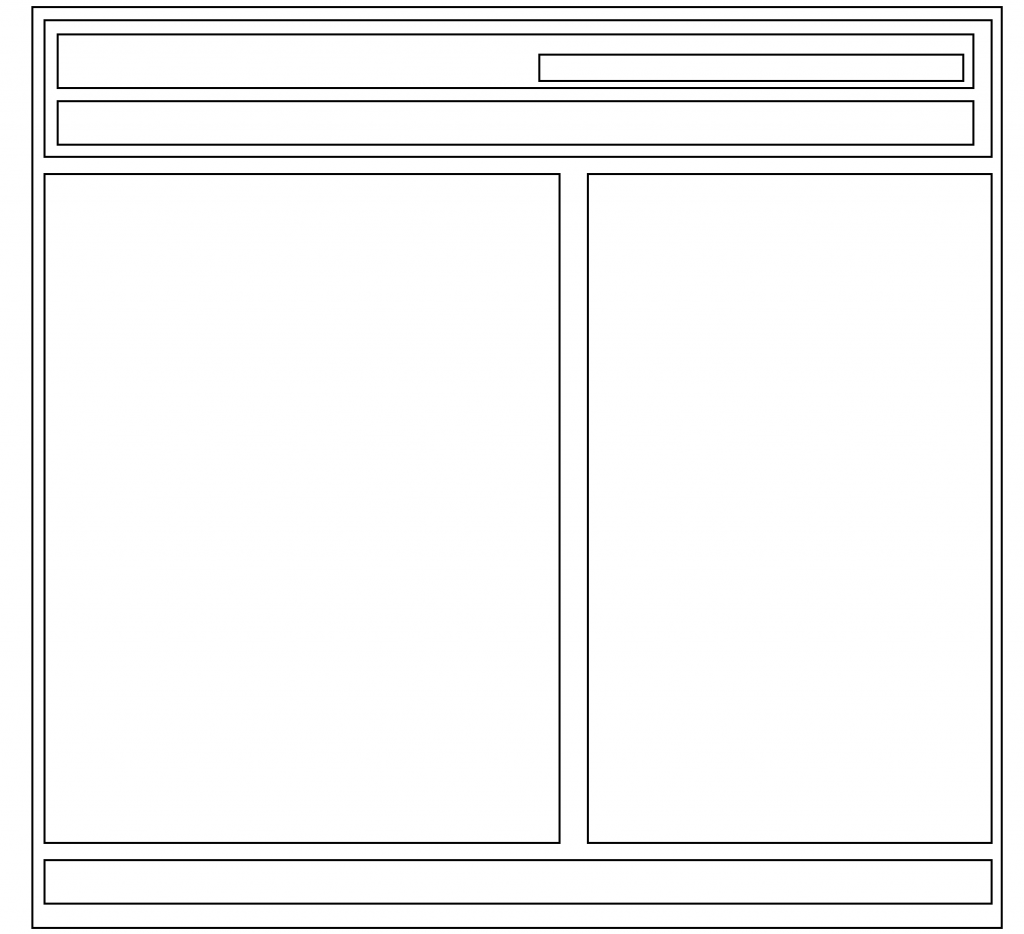
Compare the Wireframe and Final Versions of Our Page Design
Create a Simple HTML Structure
Instructions
1. Copy the HTML code below, then paste it into a new VS Code document titled index.html.
Once pasted, hit shift-option(alt)-F to Format.
<!DOCTYPE html>
<html>
<head>
<meta charset="UTF-8">
<title>ART 320 Exercise 02</title>
<meta name="viewport" content="width=device-width, initial-scale=1.0" />
<link href="style.css" rel="stylesheet">
</head>
<body></body>
</html>
2. Save index.html into a folder titled yourlastname-ex02.
3. Copy this code and paste it within your <body> tags. Once pasted, hit shift-option(alt)-F to Format:
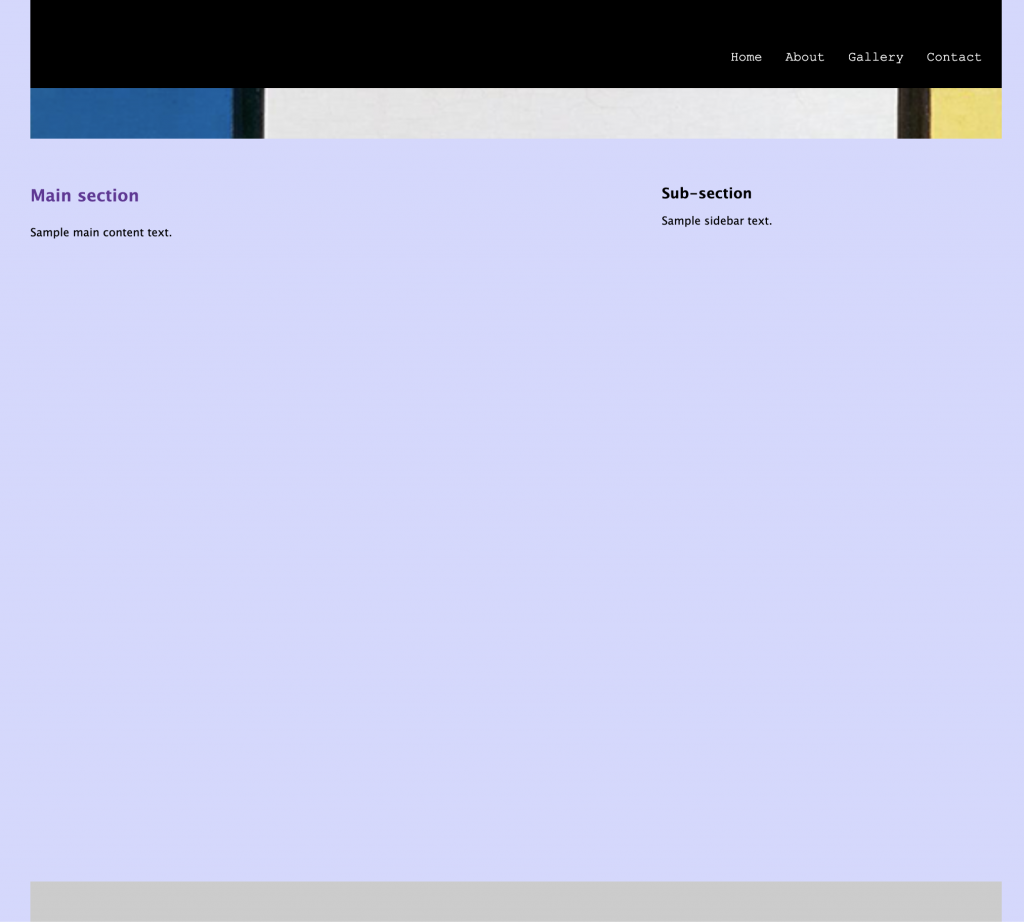
<div id="wrapper"><header><nav><ul><li><a href="index.html" title="Home">Home</a></li><li><a href="about.html" title="About">About</a></li><li><a href="gallery.html" title="Gallery">Gallery</a></li><li><a href="contact.html" title="Contact">Contact</a></li></ul></nav><div id="banner"></div></header><main><h1>Main section</h1><p>Sample main content text.</p></main><aside><h2>Sub-section</h2><p>Sample sidebar text.</p></aside><footer></footer></div> <!-- close wrapper -->
4. Examine the elements and attributes for the following parts of the page:
#wrapper – contains all elements
<header> contains a <nav> element and a <div id=”banner”> which will display a background-image to be added in the CSS.
<nav> contains four clickable <li><a> link elements inside a <ul>: home, about, gallery and contact.
Beneath the header flow two elements <main> and <aside>
5. Insert a web-optimized image and two paragraphs of text into the main content area.
- Change the text between the <h1> tags.
- After the <h1> tags, add a second paragraph after “Sample sidebar text.”
Click and hit return to create a new line. Type “Lorem” and hit the tab key. - Add one additional paragraph.
- Type “Lorem” and hit Return.
- Add an opening and closing <p> tag.
- Optional Shortcut to Wrap text in tags:
- Triple-click to select the entire line.
- Hit command-shift-p to open the Command Pallet.
- Begin to type Emmet, then look for the command named”Emmet: Wrap with Abbreviation”. Click it.
- Type a “p” to wrap the line in a paragraph tag.
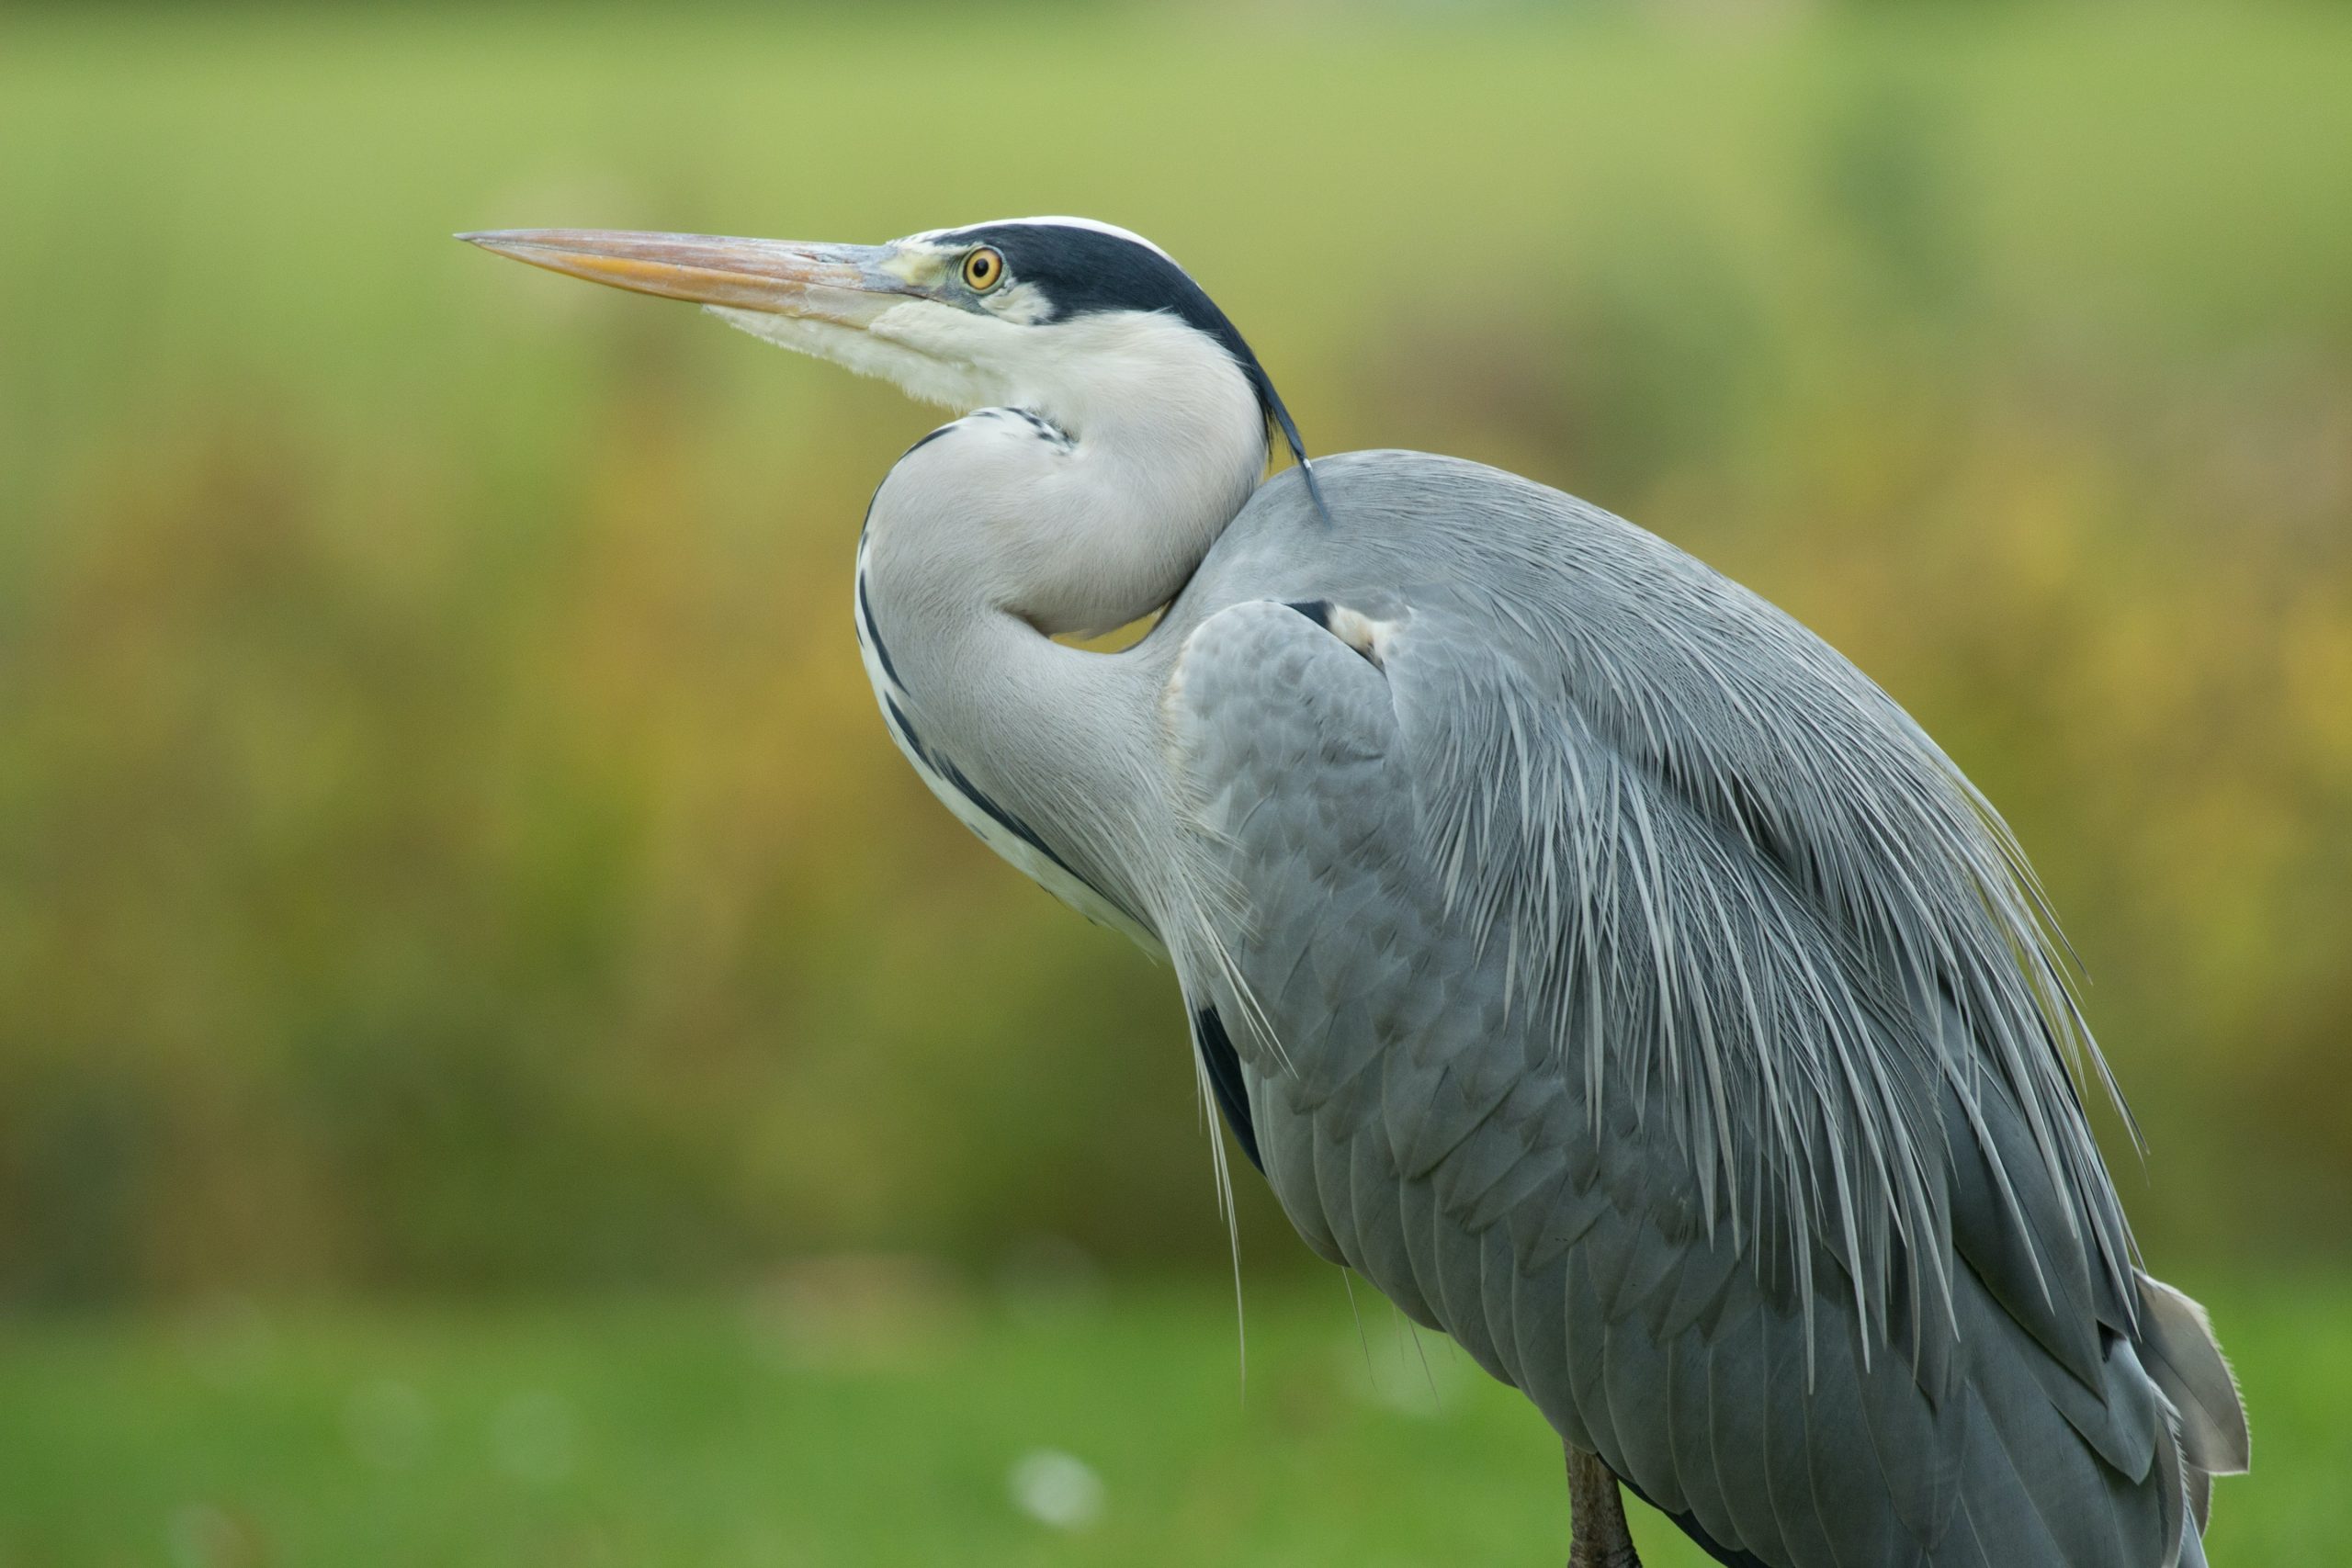
- Right-click to download this image of a grey heron and move it into a folder titled images in your site folder. Change the name of the file to heron.jpg
- Open heron.jpg in Photoshop. Choose Image>Image Size, examine the file size. With Resampling checked, reduce the size to 400px wide.
- Choose File>Export>Save for Web (Legacy)… Change to 4-Up view. In each quadrant, experiment with different file types and quality settings to determine which option gives you the best quality a the lowest file size. Hit Save, change the name to heron-400.jpg, and save it to your images folder.
- Note: JPEGS are almost always the best format for photorealistic images, while GIF and PNG tend to work better for graphics, shapes, text, etc.
- Images should be no more than around 100kb for medium size. Every image on the page adds to page-load time.
- Place this code between your two paragraphs, using the correct image filename that matches your file, and alt text:
<img src="images/heron-400.jpg" alt="close-up of a grey heron" />